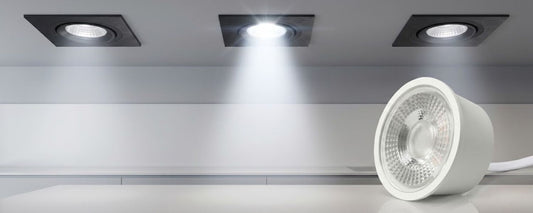
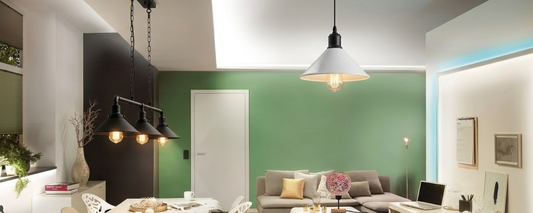
Kitchen LED Strip Lighting: The Complete Planning & Installation Guide
Kitchen Lighting Guide
How to choose, power and fit LED strip lights for worktops, plinths, islands and cupboards — without the guesswork.
Good kitchen lighting starts with the worktop, the room's proportions and the way you use the space. LED strips can then add softer layers without making the installation feel cluttered.
Key Takeaways
- Measure every run before choosing strip length or power supply.
- Match brightness, colour temperature and IP rating to the location.
- Use aluminium profiles and diffusers where appearance and heat management matter.
- Plan controls, cable routes and access to drivers before installation.
- Combine task, ambient and accent lighting rather than relying on one strip.
Jump to a section
Understanding LED strip lighting for kitchens
LED strip lighting for kitchen projects consists of small light-emitting diodes fixed along a flexible circuit board. The strip runs from a suitable low-voltage power supply, while a controller or dimmer can adjust the output on compatible systems. Its slim form makes it useful in places where a conventional fitting would be too bulky.
What LED strip lighting is and how it works
A strip is made up of repeating LED sections, usually marked with cut points. Electricity travels through the conductive tracks and each diode produces light, with the surrounding coating helping to protect the components. The power supply must match the strip's voltage, and its capacity must cover the total length being installed.
The benefits of using LED strips in a kitchen
Under cabinet LED strip lighting puts light close to the work surface, reducing the shadows that overhead fittings can cast while someone is standing at the counter. It is also discreet, flexible and easy to layer with ceiling fittings or pendant lights. A well-planned system gives clearer worktop illumination without asking one fitting to do every job.
LED strips compared with puck lights and other options
Strips generally provide a continuous wash of light, whereas puck lights create separate pools beneath individual fittings. Strips suit long worktops and shelves, while puck-style fittings can be useful for focused display lighting. Linear bars and other under-cabinet fittings are further alternatives where a more rigid installation is preferred.
Where LED strip lighting works best
The most common position is beneath wall cabinets, aimed towards the front or middle of the worktop. Strips can also sit inside cupboards, beneath an island overhang, along a plinth or behind a shallow trim. The best location is the one that supports a clear purpose, whether that is food preparation, movement through the room or highlighting a feature. Browse the full kitchen lighting collection for fittings that pair well with a strip layout.
Choosing the right LED strip lights
The best LED strip lights for kitchen use are not necessarily the brightest ones available. Consider the surface being lit, the distance from the strip to the work area and whether the light is for preparation or atmosphere. Colour quality, density and protection from moisture also affect the result.
Selecting the brightness and lumen output
Lumen output describes the light produced, but the useful amount depends on spacing and surface colour. Dark worktops often need more output than pale ones, while a shallow cabinet can distribute light more easily than a deep one. For a practical starting point, many under-cabinet applications sit around 200 to 500 lumens per foot, with the lower end suiting already well-lit rooms and the higher end suiting darker or deeper worktops.
Comparing colour temperatures for different kitchen styles
| Colour temperature | Feel | Suits |
|---|---|---|
| 2700K–3000K (Warm white) | Soft, relaxed | Timber, brass, dining areas |
| ~4000K (Neutral white) | Balanced | Everyday food preparation |
| ~5000K (Cool white) | Crisp, clear | Task-focused worktops |
The choice should agree with nearby ceiling lights, otherwise the kitchen may appear patchy when several fittings are on together.
Choosing between single-colour, tunable white and RGB strips
Single-colour strips are straightforward when the desired tone will stay consistent. Tunable white systems allow the colour temperature to change, while RGB strips are intended for coloured effects rather than accurate general task lighting. For kitchens used from morning through evening, tunable white lights can offer useful adjustment of brightness and colour temperature — controlled via a compatible LED transformer and remote.
Understanding LED density, strip length and cut points
Higher LED density usually produces a smoother line of light, especially when the strip will be visible through a diffuser. Measure the actual cabinet runs, allowing for corners and cable routes, then check where the strip can be cut. You can cut LED strip lights to fit, but only at the manufacturer's marked points; cutting elsewhere can damage a section.
Checking the IP rating for kitchen environments
An IP rating indicates resistance to ingress such as dust and water. A dry area beneath a cabinet may need less protection than a strip close to a sink or a splashback, where a suitable waterproof LED strip for kitchen use may be more appropriate. Protection does not remove the need for careful positioning, sealed joins and safe electrical connections — see the IP67 waterproof LED drivers range for splashback zones.
Kitchen strip-lighting essentials
Shop all transformers →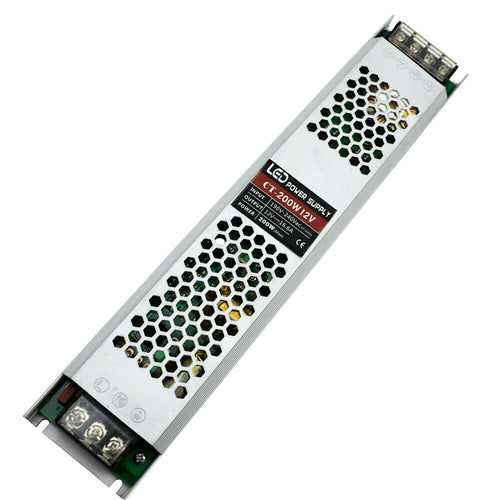
Planning your kitchen lighting layout
A lighting layout should be drawn before adhesive is peeled from the strip. Mark cabinets, appliances, doors and the likely positions of switches or sensors, then decide which runs need to operate together. This simple preparation prevents short lit areas, inaccessible drivers and cables crossing visible surfaces.
Measuring cabinets, shelves and work surfaces
Measure each straight run rather than assuming the whole kitchen is one length. Note gaps between cabinets, changes in depth and any areas where a strip must stop before a hinge or extractor. A quick sketch with dimensions makes it easier to estimate strip length, connectors and spare cable.
Positioning strips for practical task lighting
For worktop lighting, the strip should usually sit towards the front half of the cabinet underside, so the light reaches the preparation area rather than disappearing against the wall. Keep it hidden from normal eye level where possible. Test the position with a temporary piece of tape before fixing anything permanently.
Creating ambient and accent lighting
Task lighting is bright and directed; ambient lighting is softer and more general; accent lighting draws attention to a shelf, recess or architectural line. Separating these circuits gives the room more flexibility. A dimmed plinth or shelf run can remain on when the stronger worktop light is not needed.
Avoiding glare, dark spots and visible hotspots
Glare is often caused by placing an exposed strip at the front edge of a cabinet or using too few LEDs for the viewing distance. Profiles with diffusers soften the points of light, while higher-density strips help create a more even appearance. Always view the proposed run from standing height, not only from directly below it.
Coordinating strip lighting with existing kitchen lights
Compare the colour temperature and control method of the new strip with existing downlights and pendants. If the ceiling fittings are warm, a very cool strip may make the worktop look disconnected. Where possible, put task and decorative runs on separate controls so the room can be adjusted for cooking, dining and cleaning.
Selecting power supplies and controls
Power planning is as important as selecting the strip itself. A tidy installation depends on placing the driver where it remains accessible, leaving room for ventilation and keeping low-voltage cables short enough to manage. Controls should be chosen at the same time, not added as an afterthought.
Calculating the required wattage and capacity
Multiply the strip's wattage per metre by the total installed length, then choose a power supply with suitable spare capacity. For example, a 24-volt strip rated at 10 watts per metre across five metres requires 50 watts before allowance is made for headroom. Check the manufacturer's figures rather than mixing ratings from different systems — the DC 24V transformer range and DC 12V transformer range both list output current and wattage on each listing.
Choosing between plug-in and hardwired power supplies
A plug-in supply can suit a small, accessible installation where a nearby socket is available. A hardwired supply can give a cleaner appearance, particularly in a new kitchen or where cables would otherwise be visible. Electrical work connected to the fixed wiring must be planned and carried out in line with UK requirements.
Using dimmers, sensors and smart controls
A dimmer is useful when the same strip serves both preparation and evening lighting. Door sensors work well inside cupboards, while motion sensors can be convenient around a pantry or plinth. Smart controls add scheduling or app-based adjustment, but compatibility between the strip, controller and driver must be confirmed first.
Connecting multiple LED strip runs safely
Several runs can be connected in parallel or through a suitable distribution arrangement, depending on the system design. Avoid forcing too much current through a single narrow strip run, and use connectors rated for the voltage and load. Before switching on, check polarity, insulation and every join.
Hiding drivers, cables and connectors neatly
Drivers can often be placed above cabinets, inside a ventilated service void or in another accessible cupboard area. Do not bury them permanently behind fixed finishes. Keep cable routes straight and restrained, and leave enough slack to remove a driver or connector without dismantling the kitchen.
Planning tip: Work out total wattage and driver position before ordering strip length — it decides whether you need one run or several parallel runs from separate drivers.
Installing LED strip lighting
Learning how to install LED strip lights in kitchen cabinetry is mostly a matter of careful preparation. The surface must be clean, the route must be measured and the electrical parts must be compatible. If the installation involves fixed wiring or uncertain connections, stop and obtain qualified help rather than treating the job as a cosmetic improvement.
Preparing the surfaces and equipment
Degrease the underside of cabinets and allow it to dry fully before using the strip's adhesive backing. Gather a tape measure, sharp scissors or cutters, connectors, cable, profiles and a tester where appropriate. Dry-fit every piece first, including the position of the driver and control.
Cutting and joining LED strips correctly
Cut only along the printed cut marks, which normally appear between repeated LED sections. Use connectors designed for the strip width and type, or solder the joins if the system calls for it. Keep the cut edge clean and test each section before covering the connection.
Fitting strips under cabinets and inside channels
The strip can be fixed directly to a clean, suitable surface, although a channel gives a more controlled and durable finish. Run it in a straight line and avoid tight bends that can damage the circuit board. Corners are usually better handled with a planned join than by folding the strip.
Using aluminium profiles and diffusers
An aluminium profile provides a neat mounting route and helps transfer heat away from the strip. Its diffuser spreads the light and hides individual LED points, which is especially useful where the fitting can be seen from across the room. Choose a profile deep enough for the strip and leave room for end caps or cable entry.
When to hire a qualified electrician: Use a qualified electrician when a new circuit, fused connection unit or alteration to fixed mains wiring is involved. A plug-in low-voltage arrangement may be simpler, but the manufacturer's instructions and the property's electrical condition still matter. In a rented home or a complex fitted kitchen, professional installation is often the sensible route. See the installation guide for wiring reference before you start.
Designing different kitchen lighting effects
Once the practical layout works, the same principles can create softer visual layers. Kitchen island LED lighting, cupboard illumination and kitchen plinth lighting effects all benefit from hidden sources and controlled brightness. Aim for deliberate pools and lines of light rather than illuminating every surface equally.
Installing under-cabinet lighting for worktops
Place the strip so it lights the front-to-back working area without shining directly into the eyes. Continuous runs are particularly effective along long counters because they avoid the separate bright circles produced by widely spaced fittings. A diffuser is worthwhile when the strip sits close to the front edge.
Lighting plinths, islands and breakfast bars
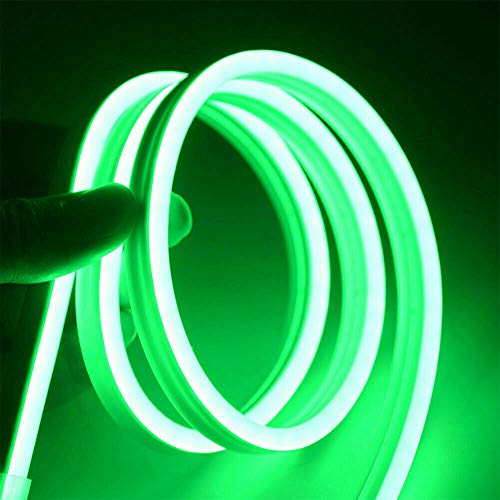
A recessed plinth strip can make cabinets appear lighter and help define the floor line at night. Around an island, a concealed run beneath the overhang creates a gentle floating effect, while a breakfast bar may need a lower brightness to avoid glare for seated people. Use a separate control from the worktop run — a waterproof, cuttable strip such as the one below suits both plinth and splashback runs.
Finish the layout
Shop neon flex accessories →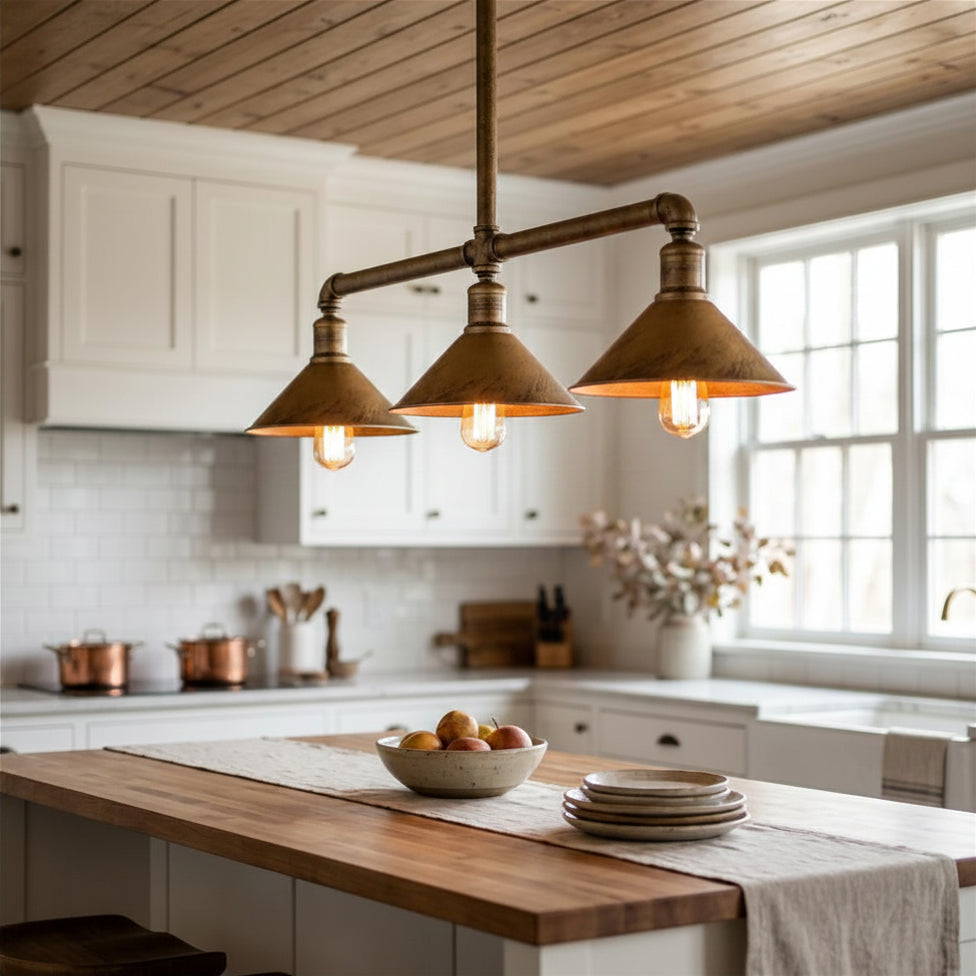
Adding illumination to cupboards and drawers
Small strips activated by a door or drawer sensor make deep storage easier to use. Keep the light source clear of moving hardware and allow the door to close without pinching the cable. A lower output is usually sufficient because the light is close to the contents.
Highlighting shelving, splashbacks and architectural features
Shelves look best when the strip is hidden behind a front lip or recessed into a channel. A splashback can take reflected light from above or below, but glossy finishes need careful testing because they reveal bright points and reflections. Recesses, beams and alcoves can use narrow runs to add depth without competing with the worktop.
Combining warm and cool white light effectively
The warm white vs cool white choice does not need to be absolute across the whole room. Cooler, clearer light may suit food preparation, while a warmer tone can make an island or dining edge feel more relaxed. Keep the transition intentional and avoid placing visibly different temperatures beside one another without a reason.
Maintaining and troubleshooting kitchen LED strips
LED systems need little routine attention, but kitchens expose them to grease, steam and frequent switching. A periodic visual check can catch loose profiles, discoloured sections or damaged insulation early. Keep the driver accessible so faults can be diagnosed without removing cabinetry.
Cleaning strips, profiles and diffusers
Switch the system off before cleaning. Wipe accessible profiles and diffusers with a soft, slightly damp cloth, then dry them thoroughly; do not flood the strip or spray cleaner into joins. Grease around a diffuser can reduce the apparent output, so gentle, regular cleaning is better than aggressive scrubbing.
Fixing flickering, dimming and uneven brightness
Flickering may come from a loose connector, an overloaded driver, poor polarity or an incompatible dimmer. Uneven brightness can result from voltage drop on a long run or from feeding a strip from only one end when the design requires more even distribution. Test sections separately and work backwards from the power supply.
Diagnosing overheating and power supply problems
Warm components deserve attention, particularly when a strip is enclosed without ventilation or the driver is operating close to its limit. Turn off the system if there is a burning smell, visible damage or abnormal heat. Check the driver rating, cable connections and profile ventilation, then replace unsuitable parts rather than masking the symptom.
Replacing damaged sections and connectors
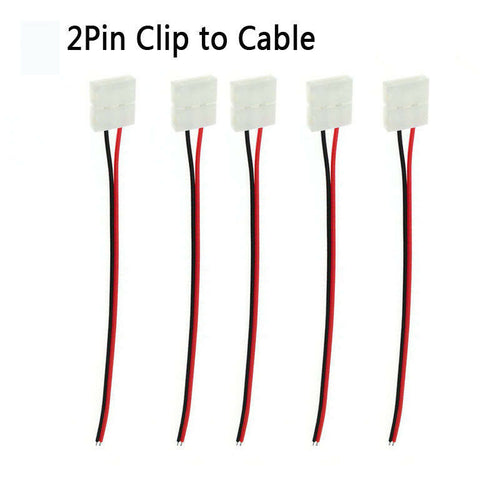
A faulty section can often be removed at its marked cut points and replaced with a matching piece. Confirm voltage, width, colour temperature and LED density before joining the new section. If connectors have loosened, remake the connection cleanly instead of repeatedly pressing the old one into place — a fresh clip-to-cable connector is a low-cost fix.
Improving the lifespan and energy efficiency of the system
Use the lowest comfortable brightness, switch decorative runs off when they are not needed and keep drivers cool and accessible. Good profiles, sound joins and sensible cable sizing reduce stress on the system. Retailers such as Ledsone offer lighting components including transformers, lampshades and holders, which can be useful when planning a broader lighting refresh alongside LED work.
Conclusion
A successful kitchen strip-lighting project balances useful worktop light with softer layers for the rest of the room. Measure carefully, select compatible components, protect areas exposed to moisture and use profiles or diffusers where the finish will be visible. With the wiring and controls planned before installation, LED strips can provide a clean, adaptable result for everyday cooking and evening use.
Frequently Asked Questions
How many lumens do I need for kitchen LED strip lighting?
A common starting range is around 200 to 500 lumens per foot for under-cabinet lighting. Choose nearer the lower end for pale, shallow worktops with strong overhead light, and nearer the higher end for darker or deeper surfaces.
What's the best LED strip for under kitchen cabinets?
Choose a strip with suitable brightness, colour rendering, density and colour temperature for the worktop. A diffuser and a compatible low-voltage power supply can matter as much as the strip itself.
Can you cut LED strip lights to fit?
Yes, most strips can be cut at their marked cut points. Cutting between those points can leave a section unusable, so measure first and follow the product instructions.
Are waterproof LED strips necessary in a kitchen?
Not always. A dry underside of a cabinet may need less protection, while areas near sinks, splashbacks or steam may call for an appropriate IP rating and properly sealed connections.
How do I power LED strip lights in a kitchen?
Use a power supply that matches the strip voltage and provides enough wattage for the complete run, with sensible spare capacity. Plug-in systems may suit small projects; fixed-wiring changes should be handled by a qualified electrician.
Is warm white or cool white better for a kitchen?
Warm white creates a relaxed, softer appearance, while cool white can provide a crisper feel for visibility. Neutral or tunable white is a practical compromise when the kitchen serves several purposes.
Can LED strips be used for kitchen island lighting?
Yes. Concealed strips beneath an island overhang, along its plinth or inside a feature detail can add useful definition. Keep island lighting separately controlled so it can be dimmed independently from task lighting.
Ready to plan your kitchen strip-lighting layout?
Browse power supplies, waterproof strip and connectors, or explore the wider kitchen lighting collection.
Shop Kitchen Lighting
Etiquetas:
Anterior
Lamp Shade Trends 2026: What's Lighting Up UK Homes This Year
Próximo
Indirect and Direct Lighting: Combined Lighting Concepts for Optimised Room Design