How to Wire a Ceiling Rose: Step-by-Step Guide for UK Homes
So, you're looking to get your hands dirty and wire up a new ceiling rose? It's a common bit of DIY, and honestly, not as scary as it sounds if you take your time and follow the steps. Whether you're replacing an old one or putting in a new light fitting, getting the wiring right is key to a safe and working light. This guide will walk you through it, step-by-step, so you can get that new ceiling rose looking good and working perfectly.
Key Takeaways
- Before you start any electrical work, always turn off the power at the consumer unit and double-check with a voltage detector to make sure the circuit is dead. Safety first!
- When removing the old fitting, carefully identify the wires. You'll need to find the switched live wire, which controls your light switch, using a multimeter set to ohms and bleep test mode.
- Mark the switched live wire clearly once identified. This helps ensure you connect it to the correct terminal on your new ceiling rose.
- Connect the wires to the appropriate terminals on the new ceiling rose: neutral wires to the neutral block, live wires to the live block, and the marked switched live wire to the switch block.
- After connecting the lamp holder and bulb, restore the power at the consumer unit and test your new ceiling rose to confirm everything is working as it should.
Preparing To Wire Your Ceiling Rose
Right then, before we get stuck into the actual wiring of your new ceiling rose, there are a few important things to sort out first. It’s a bit like making sure you’ve got all your ingredients ready before you start cooking – you don’t want to be halfway through and realise you’ve forgotten something vital.
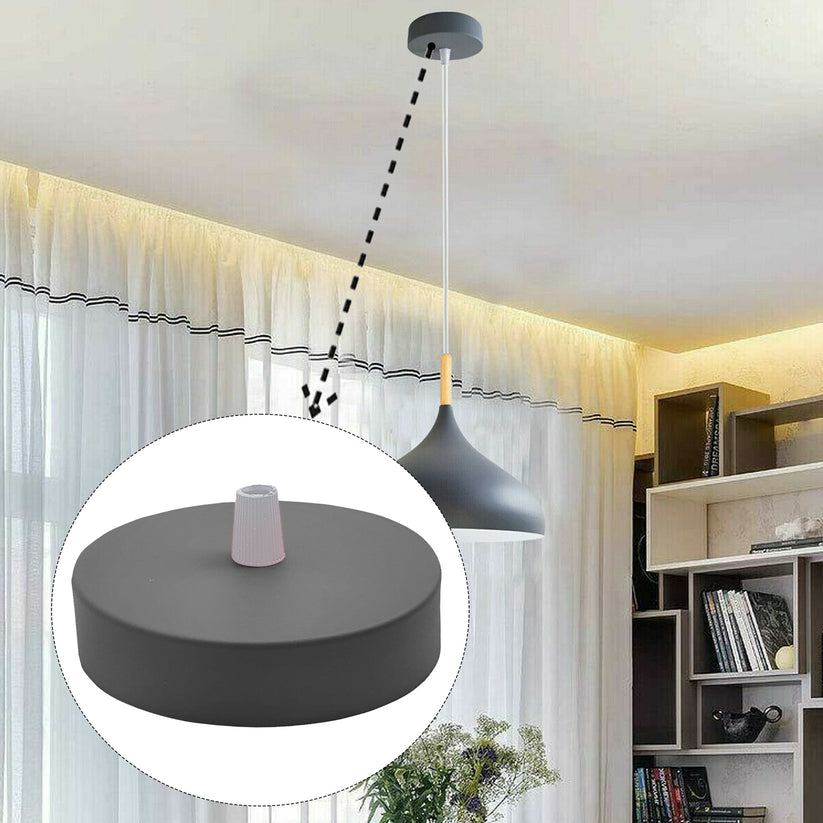
Choosing The Right Ceiling Rose
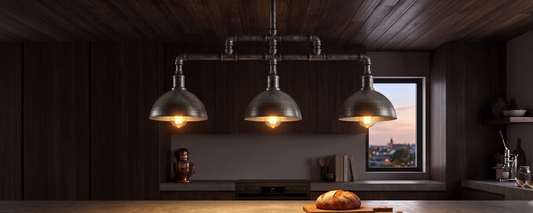
First off, have you picked out the actual ceiling rose you want to fit? They come in all sorts of styles, from plain and simple to quite ornate plaster ones. Think about the room it’s going in. A fancy rose might look great in a living room but could be a bit much for a small hallway. It’s also worth checking the size to make sure it covers any old marks on the ceiling from the previous fitting. You can find loads of ideas online to get you started.
 17% OFF
 70% OFF
 21% OFF

Assessing Your DIY Skills
Now, be honest with yourself. Are you comfortable with basic DIY tasks? If you’ve never really done much electrical work before, or if you’re feeling a bit unsure, it’s probably best to get a qualified electrician in. Seriously, messing about with electricity when you don’t know what you’re doing can be really dangerous. It’s not worth the risk. If you’re confident you can handle it, then great, let’s carry on.
Isolating The Electricity Supply
This is the most important step, and you absolutely cannot skip it. You must turn off the power at the mains before you do anything else. Head over to your consumer unit (that’s the fuse box to most of us) and switch off the breaker for the lighting circuit you’ll be working on. Don’t just rely on switching off the light itself; you need to cut the power to the whole circuit. Once you’ve done that, it’s a good idea to use a voltage tester to double-check that the power is definitely off at the light fitting. You don’t want any nasty surprises. It’s all about prioritizing your personal safety when you're dealing with electrics.
Always make sure no one else in the house is going to switch the power back on while you're working. A quick word with anyone else at home is a good idea, or even put a note on the consumer unit if you're really worried
Safely Disconnecting The Old Fitting
Right then, before we even think about connecting up that shiny new ceiling rose, the absolute first thing we need to do is make sure the power is off. Seriously, don't skip this bit. Working with electricity when it's live is a recipe for disaster, and nobody wants that. It’s all about being safe and sensible here.
Turning Off Power At The Consumer Unit
First things first, head over to your consumer unit – that's your fuse box, basically. You need to find the breaker or fuse that controls the lighting circuit for the room you're working in. Flip that switch to the 'off' position. If you're not sure which one it is, it's better to turn off the main switch for the whole house, just to be absolutely certain. It might mean your telly goes off for a bit, but it's a small price to pay for not getting a nasty shock.
Verifying Power Isolation With A Detector
Now, just because you've flipped the switch doesn't mean it's definitely off. Sometimes, wiring can be a bit… surprising. Grab yourself a voltage detector – they're not expensive and are a really handy bit of kit for any DIYer. Gently touch the probes of the detector to the wires inside your existing light fitting (we'll get to removing that in a sec). If it lights up or beeps, the power is still on, so you need to go back to the consumer unit and try again. You want to see absolutely no reaction from the detector. This step is your safety net, so don't rush it.
Removing The Existing Light Bulb And Fitting
Once you're 100% sure the power is off, you can carefully unscrew the existing light bulb. Don't just yank it out; give it a gentle twist. After the bulb is out, you'll usually see a cover or the base of the old fitting. There are typically a few screws holding it to the ceiling. Undo these, and the old fitting should come away. You'll then see the wires coming out of the ceiling. Don't be alarmed if they look a bit messy; that's what we're here to sort out. You might find it helpful to have a look at how to fit ceiling lights for general guidance on dealing with wires.
Remember, if at any point you feel unsure or out of your depth, it's always best to call in a qualified electrician. Safety first, always.
Identifying Wires For Your Ceiling Rose
Right then, you've got the power safely off, and the old light fitting is out of the way. Now comes the bit where we figure out which wire does what. It's not as complicated as it sounds, honestly. You'll see a few wires hanging down from the ceiling, and we need to know which one is the 'switched live'. This is the wire that actually makes your light switch work – turning it on and off.
Setting Up Your Test Meter Correctly
First things first, grab your multimeter or voltage tester. Make sure it's set up correctly for testing continuity or voltage, depending on your device. For finding the switched live, you'll want to set it to test for voltage. It's really important to get this right before you even think about touching any wires. If you're unsure about your tester, have a quick look at its manual. It's better to be safe than sorry when you're dealing with electricity.
Locating The Switched Live Wire
Now, with the power still off at the consumer unit, you'll need to identify the wires. In modern UK wiring, you'll typically see brown for live, blue for neutral, and green/yellow for earth. Older installations might have different colours, like red for live and black for neutral, so it's good to be aware of British wiring colours. You'll usually have three sets of wires coming from the ceiling: one for the permanent live, one for the neutral, and one for the switched live. To find the switched live, you'll need to temporarily turn the power back on at the consumer unit (just for a moment, and only after you've checked everything else is safe and nobody else is fiddling with switches!). Then, carefully touch the probes of your voltage tester to the ends of the wires. Flick your light switch on and off. The wire that shows a voltage reading when the switch is ON, and no reading when it's OFF, is your switched live. Remember, this is a quick test; turn the power off again straight after.
Marking The Switched Live Wire
Once you've found it, you need to make sure you don't mix it up with the other wires. The easiest way to do this is to give it a clear mark. You can use a bit of coloured electrical tape, or some heat shrink sleeving if you have it. Just wrap it around the wire near the end. This visual cue will be a lifesaver when you're connecting everything up to the new ceiling rose, preventing any mix-ups. It's a small step, but it makes the next part much smoother.
Always double-check your work. If you're ever in doubt about identifying wires or completing the connection, it's best to call a qualified electrician. Safety is the absolute priority here.

Connecting The New Ceiling Rose
Right then, you've got the old fitting off and you've identified all those wires. Now for the bit where we actually connect up the new ceiling rose. It's not as complicated as it might sound, honestly. Just take your time and follow these steps.
Connecting Wires To Terminal Blocks
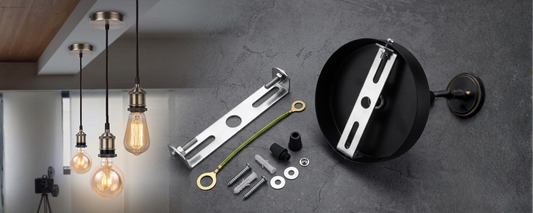
This is where you'll be screwing the wires into their correct spots on the new ceiling rose. You'll need a screwdriver for this. Remember those wires we talked about? The live, neutral, and earth? They all go into specific terminals. It's really important to get these right, otherwise, your light won't work, or worse, it could be unsafe.
Here's a quick rundown of where things generally go:
- Neutral Wires: These are usually the blue ones. You'll typically have two neutral wires coming from the ceiling (part of the 'loop-in' system) and one for the lamp holder. These all go into the neutral terminal block, which is often on the left.
- Live Wires: These are the brown ones. You'll have one main live from the supply and one for the lamp holder. These go into the live terminal block, usually in the centre.
- Switched Live Wire: This is the one we carefully identified earlier. It's the wire that actually controls the light via the switch. This one goes into its own terminal, often labelled 'switch' or similar, usually on the right.
Fitting The Lamp Holder And Bulb
Once all the main wires are connected to the ceiling rose itself, you'll have two wires left from your new lamp holder. These connect to the remaining terminals on the ceiling rose – one neutral and one live. Just like before, make sure they're secure.
Don't overtighten the screws on the terminal blocks. You want a firm connection, but you don't want to damage the plastic or the wire.
After that, it's simply a case of screwing in your new light bulb. Make sure it's the correct wattage for the lamp holder, as specified on the fitting itself. Too high a wattage can be a fire hazard, so always check.
And that's pretty much it for the wiring part! It might seem a bit fiddly, but once you've got the wires in the right place, it's quite satisfying. If you're looking to add a new light fitting, understanding how to wire a ceiling rose is a key skill, and you can find more general advice on fitting ceiling lights if you're doing more than just replacing the rose.

Final Steps For Your Ceiling Rose Installation
Right then, you've got the wires connected and the lamp holder in place. It's time to get the power back on and see if your hard work has paid off. This is the moment of truth!
Restoring The Electricity Supply
Before you flick that switch, just do a quick visual check. Make sure no wires are poking out where they shouldn't be and that everything looks snug and secure in the terminal blocks. It’s a good idea to have a quick look at the wiring of your light fitting again to be absolutely sure. Once you're happy, head back to your consumer unit or fuse box. Carefully switch the breaker back on for the relevant circuit. You might want to let anyone else in the house know you're about to restore power, just so they're not surprised.
Testing Your New Ceiling Rose
Now for the exciting part! Go back to the light switch and flick it on. Hopefully, your new light will spring to life. If it does, brilliant! You've successfully wired your ceiling rose. If it doesn't light up, don't panic just yet. First, double-check that the bulb is screwed in properly and that the power is definitely on at the consumer unit. If it's still not working, it's time to turn the power off again at the consumer unit and retrace your steps. The most common culprits are loose connections or a wire being in the wrong terminal. Remember, safety first, so always isolate the power before fiddling with wires.
Here's a quick checklist for troubleshooting:
- Is the bulb screwed in tightly?
- Is the power on at the consumer unit?
- Are all wires securely connected in the terminal blocks?
- Is the switched live wire correctly identified and connected?
If you've gone through these steps and it's still not working, or if you're feeling unsure at any point, it's always best to call in a qualified electrician. Getting it right is important for safety and peace of mind, and there are plenty of guides to help you wire a light fitting safely if you need a refresher.
Frequently Asked Questions
Do I really need to turn off the electricity?+
Absolutely! It's super important to switch off the power at your main fuse box before you touch any wires. Electricity can be dangerous, and you don't want any nasty shocks while you're working. Always double-check with a tester to be sure the power is off.
What if I can't figure out which wire is which?+
Don't guess! You'll need a tester to find the 'switched live' wire, which is the one that controls your light switch. If you're unsure, it's best to call a qualified electrician. They know exactly what they're doing and can make sure it's all wired up safely.
Can I use any old ceiling rose I find?+
Not quite. You need to choose a ceiling rose that's suitable for your needs and looks good in your room. Think about the style you want – maybe something modern or a bit more traditional. Make sure it's the right kind for the job.
What do the different coloured wires mean?+
In the UK, you'll usually see brown wires for 'live', blue wires for 'neutral', and sometimes green and yellow for 'earth'. The 'switched live' wire is the one that goes through your light switch. It's crucial to connect them to the right terminals on the new ceiling rose.
How do I know if I've wired it correctly?+
Once everything is connected and you've turned the power back on, simply flick the light switch. If the light comes on and off as it should, you've done it right! If not, switch the power off again immediately and re-check your connections.
What if I make a mistake?+
If you're ever unsure or make a mistake, the safest thing to do is switch the power off at the main fuse box straight away. It's always better to be safe than sorry. If you can't fix it yourself, don't hesitate to call a professional electrician to sort it out for you.
Labels:
Vorig
Single Vs Cluster Pendant Lights: Which Works Best in Each Room?
Volgende
Conduit Lighting UK: Best Industrial Pipe Light Fittings & Kits (2026)