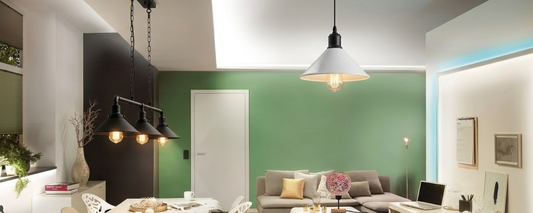
Ceiling Rose Brackets UK: The Complete Guide to Strap Fixing Light Plates
Ceiling rose brackets — also known as strap fixing plates or ceiling plate brackets — are the small but essential hardware components that safely suspend chandeliers, pendant lights, and other ceiling fixtures from your ceiling. This guide covers everything a UK homeowner, electrician, or lighting retailer needs to know: what they are, how they work, which size to choose, and how to install them safely.
Quick answer: A ceiling rose bracket is a metal strap or plate, typically made from iron or steel with a protective plating finish, that fixes to a ceiling joist or junction box and provides a secure anchor point for a hanging light fitting. UK sizes commonly range from 40mm to 295mm in length, and most standard brackets safely support fittings up to 5kg.
What Is a Ceiling Rose Bracket?
A ceiling rose bracket is a flat metal strap, typically rectangular with rounded or angled ends, designed to bridge a ceiling rose or junction box and provide a secure fixing point for the hook, chain, or cord of a light fitting. The bracket sits behind or alongside the ceiling rose, screwed directly into the ceiling joist, and holds the weight of the fitting rather than relying on the ceiling rose itself — which is often only rated for very light loads.
In the UK lighting trade, you'll hear several interchangeable names for this component:
- Ceiling rose bracket
- Strap fixing plate
- Ceiling plate bracket
- Strap brace plate
- Side-fitting bracket
They all describe the same fundamental object: a load-bearing metal strap that transfers the weight of a light fitting safely into the building structure.


Why This Matters for Chandeliers and Pendant Lights
Standard plastic or thin ceiling roses are designed to house electrical connections, not to bear significant weight. Once you move beyond a simple lightweight pendant, UK electrical safety practice calls for a dedicated bracket that:
- Distributes weight across a wider surface area
- Fixes independently into the joist (not just the plasterboard)
- Provides a secure loop or slot for a hook or chain
- Often includes an earth tag for continuity in metal fixtures
Why Strap Fixing Plates Matter
A poorly supported light fitting is one of the more common — and entirely preventable — causes of ceiling damage and fitting failure in UK homes. Strap fixing plates matter for three main reasons:
- Weight distribution. A chandelier or multi-arm pendant can weigh several kilograms. Without a bracket, that load concentrates on a small area of plasterboard or the ceiling rose's fixing screws, which can pull free over time.
- Structural safety. Most brackets are designed to spread the fixing points further apart than the ceiling rose itself, allowing screws to land on solid joist timber rather than relying on plasterboard alone.
- Electrical safety and earthing. Many brackets include a riveted earth tag, which allows a continuous earth connection where the fitting has exposed metal parts — a requirement under UK wiring practice for Class I fittings.
Types of Ceiling Rose Brackets
While the core function is the same, ceiling rose brackets come in a few distinct formats:
Strap (Side-Fitting) Brackets
The most common type — a straight metal strap with fixing holes at each end and a central slot or hook point. These are sold by length (e.g. 40mm, 70mm, 120mm) to match the diameter of the ceiling rose or canopy being installed.
Round/Crossbar Brackets
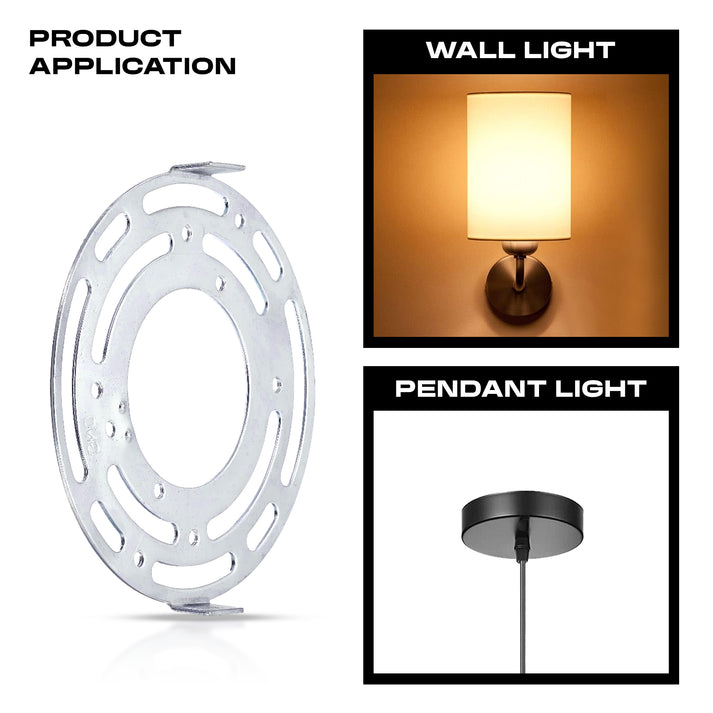
A round mounting plate with adjustable slots and a central opening, used where a fitting needs to sit over a junction box rather than to one side. These typically include ground screws and wiring nuts, and suit modern flush ceiling roses and canopies.
Classic/Decorative Brackets
Styled straps designed to remain partly visible, often used with vintage or classic-style pendant lights where th
Ceiling Rose Bracket Sizes: Full UK Size Chart
Bracket length should be chosen to match the diameter of your ceiling rose, canopy, or the spacing of your existing fixing points. Below is a general size guide based on commonly stocked UK sizes.


| Size | Typical Use | Approx. Max Load |
|---|---|---|
| 40–50mm | Compact/minimalist pendant lights, small fittings | Up to 5kg |
| 55–75mm | Standard pendant lights, small chandeliers | Up to 5kg |
| 80–110mm | Medium chandeliers, multi-arm pendants | Up to 5kg |
| 115–145mm | Larger chandeliers, wider ceiling roses | Up to 5kg |
| 155–195mm | Large or ornate chandeliers | Up to 5kg |
| 205–295mm | Extra-large or specialist fittings, wide canopies | Up to 5kg |
Note: Maximum load figures vary by manufacturer and bracket gauge. Always check the specific product's rated load before hanging a fitting, and never exceed the manufacturer's stated limit.
Materials and Construction
Most UK ceiling rose brackets are made from one of two base materials:
- Iron with protective plating — offers good rigidity and is the traditional choice for classic-style brackets.
- Steel/metal with plating finish — commonly zinc or nickel plated to resist corrosion and give a clean silver finish.
Look for these construction features when comparing brackets:
- Riveted joints rather than welded, which tend to hold up better under repeated stress
- Earth tag — a small riveted tab for connecting a earth wire, essential for metal-bodied fittings
- Pre-drilled fixing holes sized for standard wood screws
- Rounded or deburred edges to avoid damaging cable insulation during installation
How to Choose the Right Bracket Size
Choosing the correct size comes down to three checks:
1. Measure the Ceiling Rose or Canopy Diameter
Measure across the widest point of the ceiling rose or canopy that will sit over the bracket. The bracket should be slightly smaller than, or equal to, this diameter so it stays hidden and doesn't obstruct the rose from sitting flush.
2. Check the Existing Fixing Points
If you're replacing an existing fitting, note the spacing between the current screw holes — matching this spacing to a same-size bracket makes reinstallation far simpler.
3. Confirm the Weight Rating
Weigh (or estimate) the light fitting, including any glass shades, arms, or crystal detailing. Compare this to the bracket's stated maximum load and choose a size with headroom rather than one at the exact limit.
Rule of thumb: When in doubt, choose the next size up rather than down — a slightly larger bracket that's fully hidden behind the ceiling rose is a better outcome than one that's too small to sit flush or too weak for the fitting.
Step-by-Step Installation Guide
Safety note: Always isolate the electrical supply at the consumer unit before starting any ceiling fitting work. If you are not confident working with electrics, engage a qualified electrician — in the UK, certain types of electrical work in kitchens and bathrooms fall under Part P Building Regulations and must be certified.
- Turn off the power at the consumer unit and confirm the circuit is dead using a voltage tester.
- Remove the existing fitting (if replacing one) and take note of the wiring configuration.
- Locate the ceiling joist. Use a stud/joist detector, or work from the existing fixing points if reinstalling.
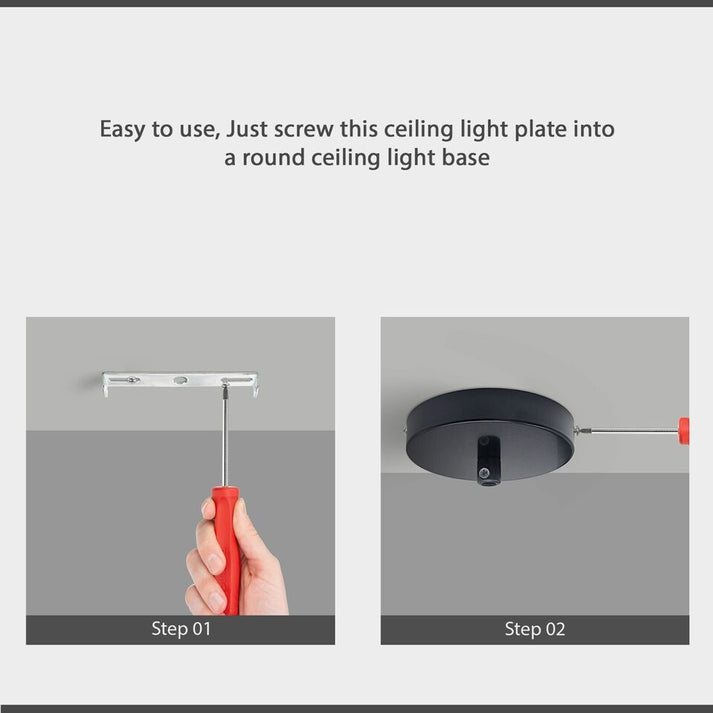
- Position the bracket centrally over the electrical connection point, aligning the fixing holes with the joist.
- Screw the bracket into place, ensuring both ends are firmly anchored into solid timber rather than plasterboard alone.
- Connect the earth wire to the bracket's earth tag, if fitted, and complete the live/neutral connections per the fitting's instructions.
- Hang the fitting from the bracket's hook or slot, checking it sits securely before releasing full weight onto it.
- Fit the ceiling rose or canopy over the bracket so all metalwork is concealed.
- Restore power and test the fitting.
Safety Considerations and UK Wiring Regulations
When installing or replacing ceiling rose brackets in the UK, keep the following in mind:
- BS governs safe electrical installation practice in the UK, including earthing requirements for Class I light fittings with exposed metal parts.
- Load ratings are not guidelines to push against. A bracket rated to 5kg should not be used for a fitting close to or exceeding that weight; leave a safety margin.
- Fix into structural timber, not just plasterboard. Plasterboard alone cannot reliably bear the weight of most ceiling light fittings over time.
- Check for a Part P requirement. Notifiable electrical work (generally new circuits, not simple like-for-like fitting swaps) may need to be certified by a registered electrician or signed off via Building Control.
- Inspect older properties carefully. Period homes may have deteriorated joists, lath-and-plaster ceilings, or non-standard rose spacing that require extra care or professional assessment.
Common Problems and Troubleshooting
The bracket doesn't sit flush behind the ceiling rose.
This usually means the bracket is too large for the rose diameter. Measure the rose's internal cavity depth and diameter before ordering a replacement.
The fitting feels loose or has slight movement.
Check that both fixing screws are seated in solid joist timber. A bracket anchored on one side only (with the other side in plasterboard) will flex under load over time.
No earth tag on the bracket, but the fitting has exposed metal.
Choose a bracket that includes a riveted earth tag, or have an earth connection added by a qualified electrician — this is a safety-critical detail for metal-bodied fittings.
Ceiling rose won't close over the bracket and wiring.
This is often a depth issue rather than a diameter issue. Some canopies have limited internal clearance; a slimmer bracket profile may be required.
Ceiling Rose Brackets vs Other Mounting Methods
| Method | Best For | Load Capacity | Notes |
|---|---|---|---|
| Strap fixing bracket | Most pendant lights and chandeliers | Up to 5kg (standard) | Hidden behind ceiling rose; most common UK method |
| Direct ceiling rose fixing | Very lightweight fittings only | Under 1–2kg | Not recommended for chandeliers |
| Batten holder | Simple bulb holders, utility spaces | Light fittings only | No decorative rose; functional only |
| Heavy-duty joist hanger/hook | Very heavy chandeliers, statement pieces | 10kg+ | Specialist installation, often professional-only |
For the vast majority of UK residential pendant lights and chandeliers, a standard strap fixing bracket sized correctly for the fitting is the appropriate and most cost-effective solution.
Buying Guide: What to Look For
When shopping for ceiling rose brackets in the UK, prioritise:
- Accurate sizing — measure first, buy second
- Riveted construction over welded, for long-term durability
- Earth tag included, particularly for metal fittings
- Stated maximum load, clearly listed by the retailer
- Corrosion-resistant plating, especially for bathrooms or humid rooms
- Included accessories — many brackets come complete with screws and wall plugs for straightforward installation
- Retailer stock depth — a supplier offering the full size range (40mm through to 295mm+) makes it easier to source an exact match rather than compromising on a close-but-not-quite size
Frequently Asked Questions
What is a ceiling rose bracket used for?+
A ceiling rose bracket is used to securely anchor hanging light fittings, such as chandeliers and pendant lights, to a ceiling joist. It provides structural support that a standard ceiling rose alone may not provide.
What size ceiling rose bracket do I need?+
Measure the diameter of your ceiling rose or canopy and choose a bracket that is the same size or slightly smaller so it remains hidden once installed. UK ceiling rose brackets are commonly available in sizes ranging from 40mm to 295mm.
How much weight can a ceiling rose bracket hold?+
Most standard UK ceiling rose brackets are designed to support light fittings up to 5kg, although the exact weight capacity depends on the product design, material thickness, and manufacturer specifications. Always check the stated load rating before installation.
Do ceiling rose brackets need an earth connection?+
If the light fitting has exposed metal parts and is a Class I fitting, it requires an earth connection. Many ceiling rose brackets include a built-in earth tag, but if your fitting requires one, ensure the bracket provides a suitable earth connection point.
Can I fit a ceiling rose bracket myself?+
A straightforward like-for-like replacement can often be completed as a DIY task if the power is isolated and the bracket is securely fixed into solid joist timber. If you are unsure or the work involves new circuits, consult a qualified electrician, as some electrical work falls under UK Part P regulations.
What's the difference between a ceiling rose and a ceiling rose bracket?+
A ceiling rose is the visible component that covers and houses the electrical connections. A ceiling rose bracket is the hidden structural support component that fixes to the ceiling and carries the weight of the light fitting.
Are ceiling rose brackets a standard size?+
No. Ceiling rose brackets are available in a range of sizes, commonly from 40mm to 295mm in the UK, to suit different ceiling roses, canopies, and light fitting requirements. Measuring before purchasing is essential.
Conclusion
Ceiling rose brackets are a small, inexpensive component that plays an outsized role in the safety and longevity of your light fittings. Whether you're hanging a minimalist pendant or a statement chandelier, choosing the correct size, checking the load rating, and fixing securely into joist timber are the fundamentals that make the difference between a fitting that lasts for years and one that fails prematurely.
With UK strap fixing plates available from 40mm through to 295mm and beyond, there's a bracket sized correctly for almost any ceiling rose or canopy — the key is measuring accurately, buying from a supplier who stocks the full range, and following safe electrical practice throughout installation.
Tags:
Previous
Single Pendant vs Cluster: Which Is Right for Your Kitchen Island in 2026?
Next
How Much Do LED Bulbs Really Save on Your Energy Bill? (2026 UK Figures)